How to Import Presets in Adobe Lightroom (Step-by-Step Guide)
Share
If you’re just starting with photo editing, Lightroom presets can completely transform your workflow. They allow you to apply a professional look to your photos with just one click. Whether you’ve just purchased my Aesthetic Presets — Timeless Collection or downloaded presets elsewhere, this guide will show you exactly how to install and use them.
What Are Lightroom Presets?
Lightroom presets are pre-saved editing settings. Instead of adjusting contrast, exposure, highlights, or colors manually, a preset applies those changes instantly. Think of it as a photo filter — but far more powerful and customizable.
How to Import Presets in Lightroom (Desktop)
Follow these simple steps to install your new presets in Lightroom Classic or Lightroom CC on desktop:
Download & Unzip Your Presets
After purchase, you’ll receive a .zip file.
Extract/unzip the file — inside, you’ll see folders with .XMP or .DNG files (these are your presets).
Open Lightroom
Launch Adobe Lightroom Classic or Lightroom CC on your computer.
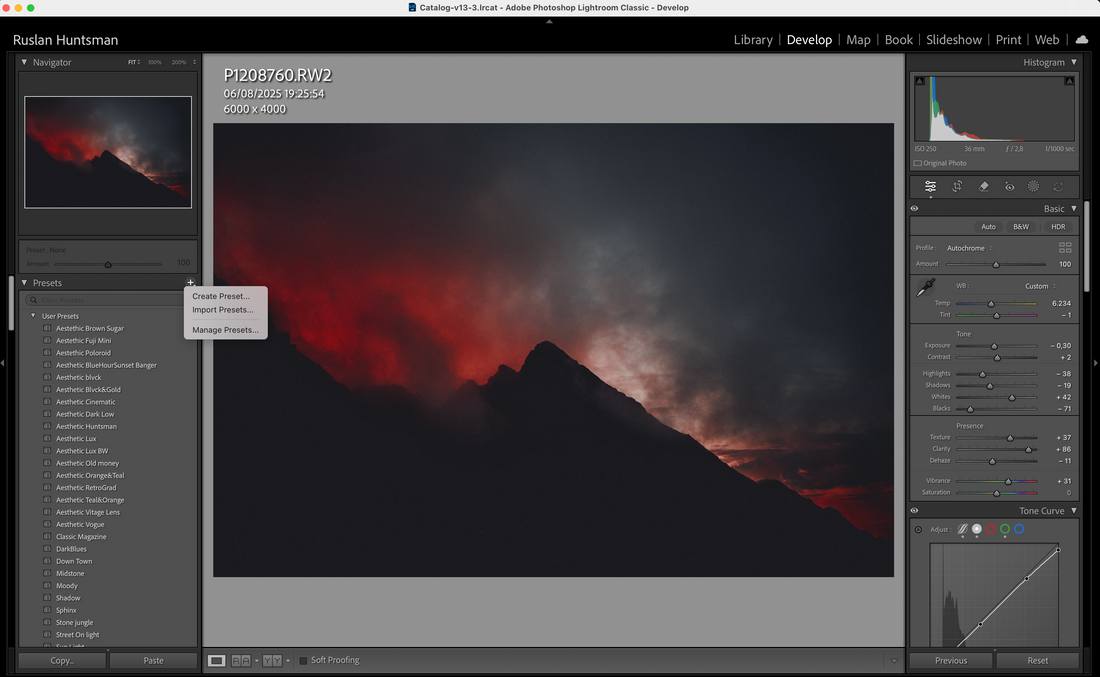
Navigate to Presets Panel
On the right-hand side of the Develop module, find the Presets panel.
Click Import
In the Presets panel, click the “+” icon at the top and select “Import Presets.”
Select Preset Files
Locate the .XMP files you just unzipped.
Select them and click Import.
Done!
Your presets will now appear in the Presets panel. Simply click on one to apply it to any photo.
Tips for Best Results
1. Presets are a starting point — don’t be afraid to adjust exposure, white balance, or skin tones.
2. Try presets on different lighting conditions to see how they adapt.
3. Save your own customized versions for a personal style.
Final Thoughts
Installing presets in Lightroom is super simple once you know the steps. With my Aesthetic Presets — Timeless Collection, you’ll have timeless film-inspired edits and modern looks at your fingertips.
Bring your photos to life with just one click — and spend more time shooting, less time editing.